
 By
A new heating and cooling system comes with a long list of promises: lower bills, quieter operation and even temperatures from room to room. Most of those promises depend less on the equipment you pick and more on what happens during the one or two days the crew spends at your house.
Two identical heat pumps from the same factory can perform very differently. One may hit its efficiency rating for fifteen years. The other may struggle from the first summer because of a rushed vacuum, a guessed refrigerant charge or a line set squeezed into a tight corner. The difference can’t be seen from the driveway, so it’s easy to miss.
For homeowners comparing quotes for hvac installation in Richmond, or anywhere else, it helps to know what a careful job looks like from start to finish. The steps below follow a typical installation day and point out where quality is decided.
Before Anyone Picks Up a Wrench
A good install starts before any equipment is ordered. A contractor should size the system with a room-by-room load calculation, not by matching the tonnage of the old unit. Houses change over the years. New windows, added insulation or a finished basement can make the original size wrong in either direction.
The visit should also include a look at the ductwork, the electrical panel and the spot where the outdoor unit will sit. If someone quotes a price after a five-minute walk past the old condenser, that’s worth noticing.
Permits belong in this stage too. Most localities require a mechanical permit for a system replacement, and an inspection afterward gives you a second set of eyes on the work at no extra effort.
Morning: Taking the Old System Out
Removing the old equipment sounds simple, but it comes with legal duties. Under Section 608 of the Clean Air Act, refrigerant can’t be vented into the air during servicing or disposal. A certified technician has to recover it with proper equipment first.
Watch for this step. If the old lines are simply cut and the hiss of escaping gas fills the yard, corners are being cut in more ways than one.
This is also when the crew decides whether to reuse the existing refrigerant lines. Reuse can work if the lines are the right size, in good shape and compatible with the new refrigerant. Many installers prefer new lines, especially when switching refrigerant types.
Midday: Setting and Connecting Equipment
The outdoor unit should sit level on a stable pad, with enough clearance around it for airflow and future service. Indoors, the air handler or furnace needs room for filter changes and a properly sloped condensate drain, ideally with a float switch that shuts the system down before a clogged drain floods the floor.
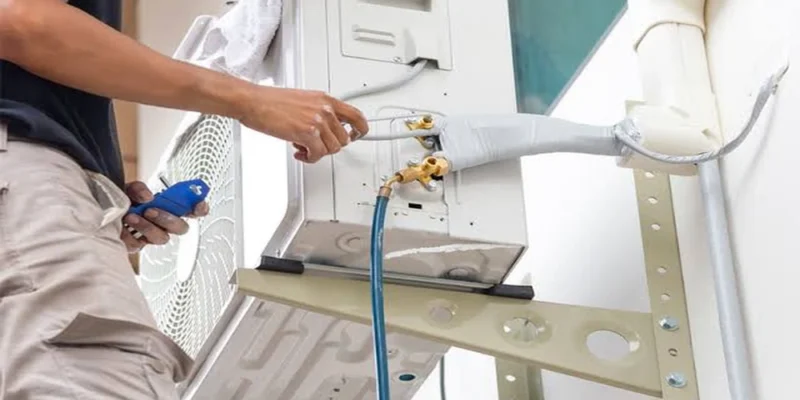
Refrigerant connections are where skill shows. Careful technicians flow dry nitrogen through the copper while brazing. This keeps scale from forming inside the pipes, and that scale can later break loose and clog small metering devices. It’s an easy step to skip and an expensive one to regret.
Afternoon: Vacuum, Charge and Startup
This stretch of the day matters most, and it’s the part most often rushed.
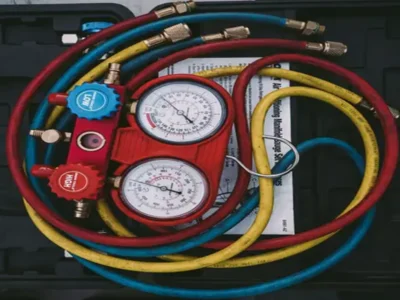
Pressure testing. Before any refrigerant goes in, the system is pressurized with nitrogen and checked for leaks. A slow drop on the gauge means a joint needs attention.
Evacuation. A vacuum pump pulls air and moisture out of the lines and indoor coil. Good practice is to read the result with a micron gauge rather than run the pump for a set time and hope. Moisture left behind can react with refrigerant oil and shorten the compressor’s life.
Charging. Many outdoor units ship pre-charged for a standard line length. Longer or shorter runs need an adjustment, and the final charge should be confirmed with superheat or subcooling readings taken in real operating conditions.
Airflow check. The blower speed has to match the duct system. Static pressure readings show whether the new unit can actually move the air it was designed for.
Paperwork Worth Asking For
Once the system is running, a short handoff should cover what was done and how. Reasonable things to request:
- The load calculation used to size the system
- Final static pressure and refrigerant readings from startup
- Model and serial numbers for warranty registration
- Permit number and inspection date
- Filter size and recommended change schedule
These records help years later, when a different technician has to diagnose a problem without knowing how the system began.
The Refrigerant Shift Behind Today’s Quotes
Recent installations reflect a broad industry move to lower-impact refrigerants such as R-454B and R-32. These are classified as mildly flammable, so equipment built for them includes leak detection sensors and specific installation requirements. Prices for new systems have moved up partly because of this transition.
For homeowners, the practical point is simple. Newer equipment and older refrigerant lines or parts don’t always mix, which is one more reason the installer’s attention to detail matters.
Judging the Job After the Crew Leaves
The first few weeks tell you a lot. The system should run long, steady cycles rather than clicking on and off. Rooms should land within a degree or two of each other. The outdoor unit should hum, not rattle. Bills, once a full season has passed, should reflect the efficiency you paid for.
If something feels off, a good installer will come back and take measurements rather than offer reassurance. A well-installed system rarely draws attention to itself, and that’s usually the clearest sign the day went the way it should.





Comments